Eyes, JAPAN
Tesoro Kintsugi
Felix Viering
Kintsugi (金継ぎ) is the traditional Japanese art of repairing broken pottery by rejoining its pieces with gold or silver lacquer. This technique highlights the cracks on the surface of a broken piece of ceramic instead of trying to hide them, and can be seen as a form of wabi-sabi (侘び寂び): a Japanese philosophy about finding beauty in imperfection.
Watanabe-San is a kintsugi artist and the owner of TESORO.accessory: a store in Fukushima, Aizuwakamatsu where she sells her handcrafted kintsugi accessories like pendants, earrings and rings made from broken pottery. Her approach to kintsugi is not to restore a broken item to its original form; She rather transforms it into something new entirely.
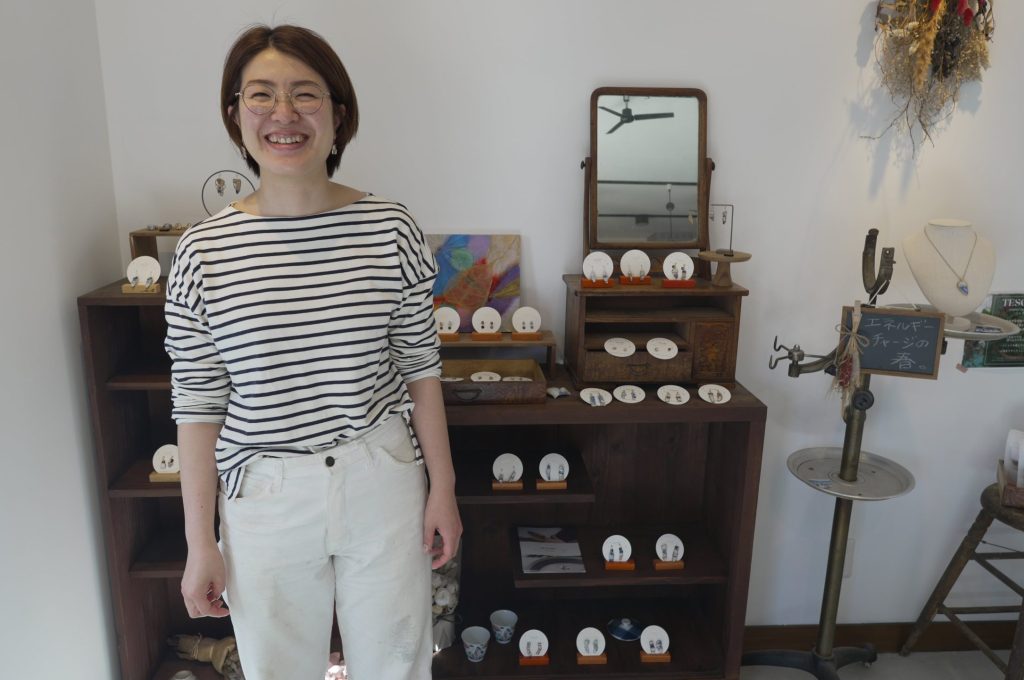
Watanabe-San with her kintsugi accessories in the background
Making a Kintsugi accessory
I was able to get a lesson in kintsugi where Watanabe-San showed me her workflow for making kintsugi accessories. I wanted to make an accessory as a gift for my mom for when I returned to Germany from my eight-month stay in Japan. With Watanabe-San guiding me through the process, I could make a pendant from broken pottery using kintsugi techniques and this is how it was done:
Step 1: shape the pieces
While the pottery we used was already broken into in pieces, they were still too big to be used as parts for the pendant I planned to craft. Therefore, the first step was to shape the broken pieces by breaking them apart into smaller fragments. Watanabe-San showed me how to use a cutting tool to crack the ceramics apart. The parts were cut inside a plastic bag that would stop the fragments in case they flew off uncontrolled.

Cutting a piece of ceramics up into smaller fragments
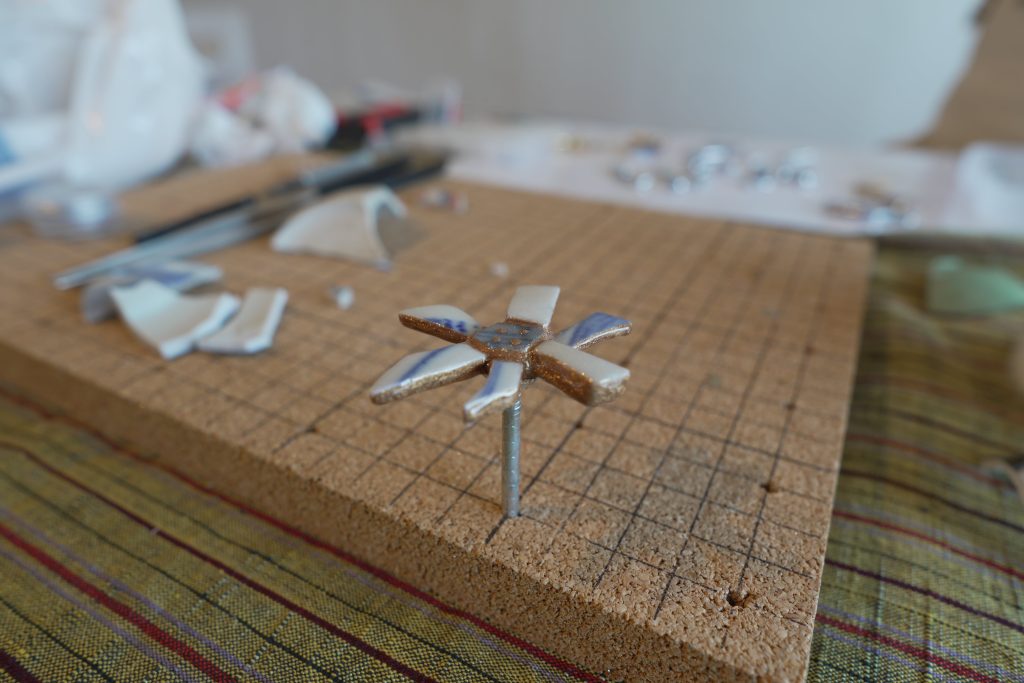
Step 2: arrange the fragments
With the pieces cut into fragments, the next step was to arrange them in the shape of the final design. I wanted the accessory to resemble a Jasmin flower, which grows in the backyard of my mom’s old home in Andalusia in Spain. The pendant would combine influences from Japan with memories from her home.

The Jasmine flower I took as inspiration for my design

Fragments arranged in the shape of a jasmine flower
For the next step, the pieces needed to be taken apart. To remember how the parts needed to be put back together after, I took a picture of the design to use as a reference later on.
Step 3: file down the sharp edges
This step requires a bit of patience and dexterity, but I found that it can also be quite therapeutic. Cutting the ceramics has left the fragments’ edges sharp. Not only are these edges unpleasant to look at, they could also scratch or poke the wearer of the accessory. Watanabe-San showed me how to use a file to sand down these edges, leaving them smooth rather than sharp.

Filing down the sharp edges of the fragments
As I was shown, I went ahead and filed every edge on every small fragment that I was going to use to craft the accessory. While filing, I could check the edges by running over them with my finger to make sure that they were smooth enough before I went on to the next piece. The process was time-consuming but, in a way, also relaxing and satisfying. After filing, I rearranged the pieces again in the shape of my design.

The fragments after filing their edges
Step 4: glue the pieces in place
With the pieces prepared, it was time to glue them together in the desired shape. The glue used in this step is a two-part adhesive that cures when its two components are combined. I used a toothpick to mix the glue and apply it to the edges of the pieces where I intended to join them. With all pieces joined, we took a break while the glue cured before beginning the next step.

Two-part adhesive used to glue the pieces together

The accessory after gluing its pieces in place
Step 5: Kintsugi
This is the step where the seems between the pieces get highlighted. This was done, again, with a two-part adhesive. Only this time, gold or silver dust was mixed into the glue. As the adhesive started to cure, right when I mixed the two components, Watanabe-San set up a timer. This would be important later.

Two-part adhesive mixed with gold dust

The timer was set to 40 minutes
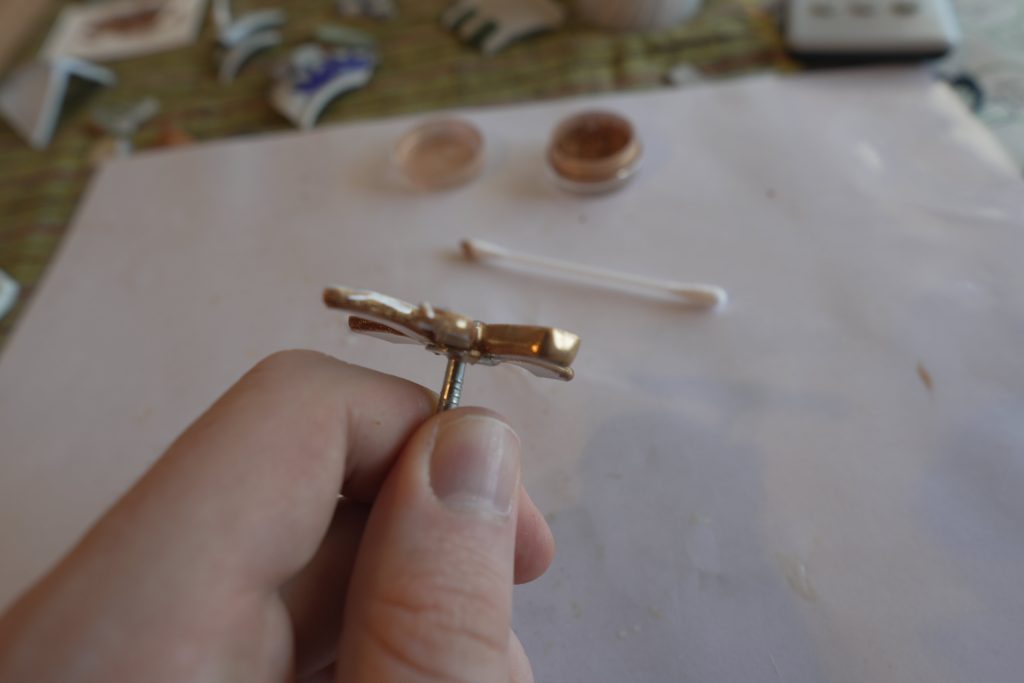
I applied the adhesive to the seems on the accessory as well as all around its edges using a toothpick, as was shown to me. To not touch the item itself, it was stuck to the head of a nail which I could hold on to. Once finished, Watanabe-San told me that I could add some decorations to the accessory’s surface, so I added four golden dots on the center fragment using the tip of the toothpick.

The accessory was stuck to the head of a nail which could be held on to
The accessory was left to cure
Once the timer finished, the adhesive was almost completely cured; it was solid but still sticky on its surface. This was the perfect time for the next step.
Step 6: finish
The golden surfaces on the accessory should have a shiny finish. At this point, the powder that was mixed with the adhesive reflects incoming light in random directions, making the surface appear rough instead. Watanabe-San showed me how to use a cotton swab to apply some of the leftover gold powder to the still sticky surfaces on the accessory, which gave them a shiny finish.
Applying gold dust to the still sticky surfaces leaves them with a shiny finish
Finally, because it is supposed to be worn as a pendant, I attached an eyelet to it and with that, the accessory was finished.

The pendant needs an eyelet to be attached to a chain
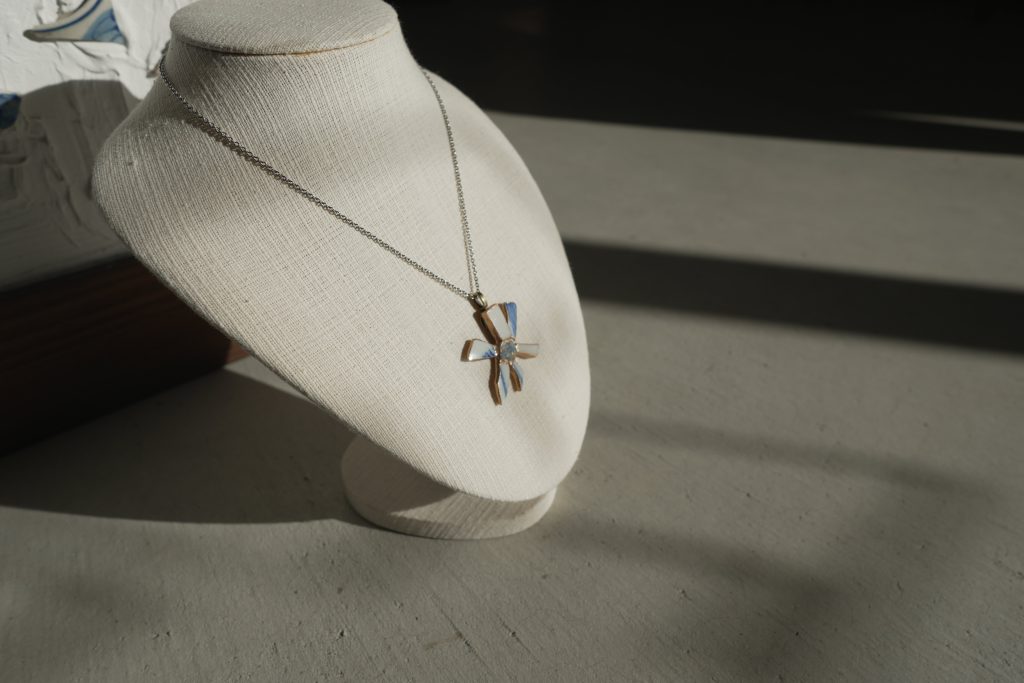
The finished kintsugi pendant on a display
Closing remarks
Kintsugi is not only an art form or a way to fix broken items. It also encompasses ideas that can be applied to how we think about many situations: breaking is a part of life, and not everything has to be broken forever. When something does break, it is an opportunity for it to grow and transform into something new. In the case of the Pendant, it would not exist in the form it does now, if the ceramics it is made out of were never broken.
If you are curious about TESORO.accessory you can visit Watanabe-San’s website here.
- Tweet
-

 2026/02/27
 2026/01/23
 2025/12/12
 2025/12/07
 2025/11/06
 2025/10/31
 2025/10/24
 2025/10/03